Introducing standalone ratelimiting
Global ratelimiting built for the modern web.
Written by
James Perkins
Published on
Today, we are introducing standalone ratelimiting. With this feature, you can rate limit anything while still leveraging the power of Unkey. Our ratelimiting feature works similarly to our keys, providing low global latency and detailed analytics. Moreover, you can configure overrides for specific identifiers, giving you more flexibility.
You can check out a demo that shows our synchronous and asynchronous implementation versus a Redis-based ratelimiter.
Using our ratelimiter
To use our rate limit feature, you can use our API directly, an existing package like @unkey/api, or our new package @unkey/ratelimit, which is completely standalone from the other features in our API. The examples below will use the new package to keep things simple.
Configure your ratelimiter
Firstly, you will want to configure the ratelimiter. Unkey uses namespaces to allow you to separate different parts of your application and have isolated limits for them. If the namespace doesn't exist, we will create it with the first request. For example, each of your tRPC routes could be a namespace. In this example, we use our ai.generate route.
1import { Ratelimit } from "@unkey/ratelimit"
2
3const unkey = new Ratelimit({
4 rootKey: process.env.UNKEY_ROOT_KEY,
5 namespace: "ai.generate",
6 limit: 10,
7 duration: "30s",
8});
Using the ratelimiter
With the ratelimiter now configured, we can use it in a route to decide whether to proceed with handling the request or reject it with a 429 response. You will need to pass an identifier for the request; this could be anything, but commonly, it is a userId or an IP address.
1async function handler(request) {
2 const identifier = request.getUserId();
3
4 const ratelimit = await unkey.limit(identifier);
5 if (!ratelimit.success) {
6 return new Response("try again later", { status: 429 });
7 }
8 // handle the request here
9}
Advanced usage
Ratelimting offers additional options to provide more advanced configurations, including cost, async requests, and resource audit logging. We also provide configurable overrides in the dashboard so specific resources with an identifier can have limits without adding additional code.
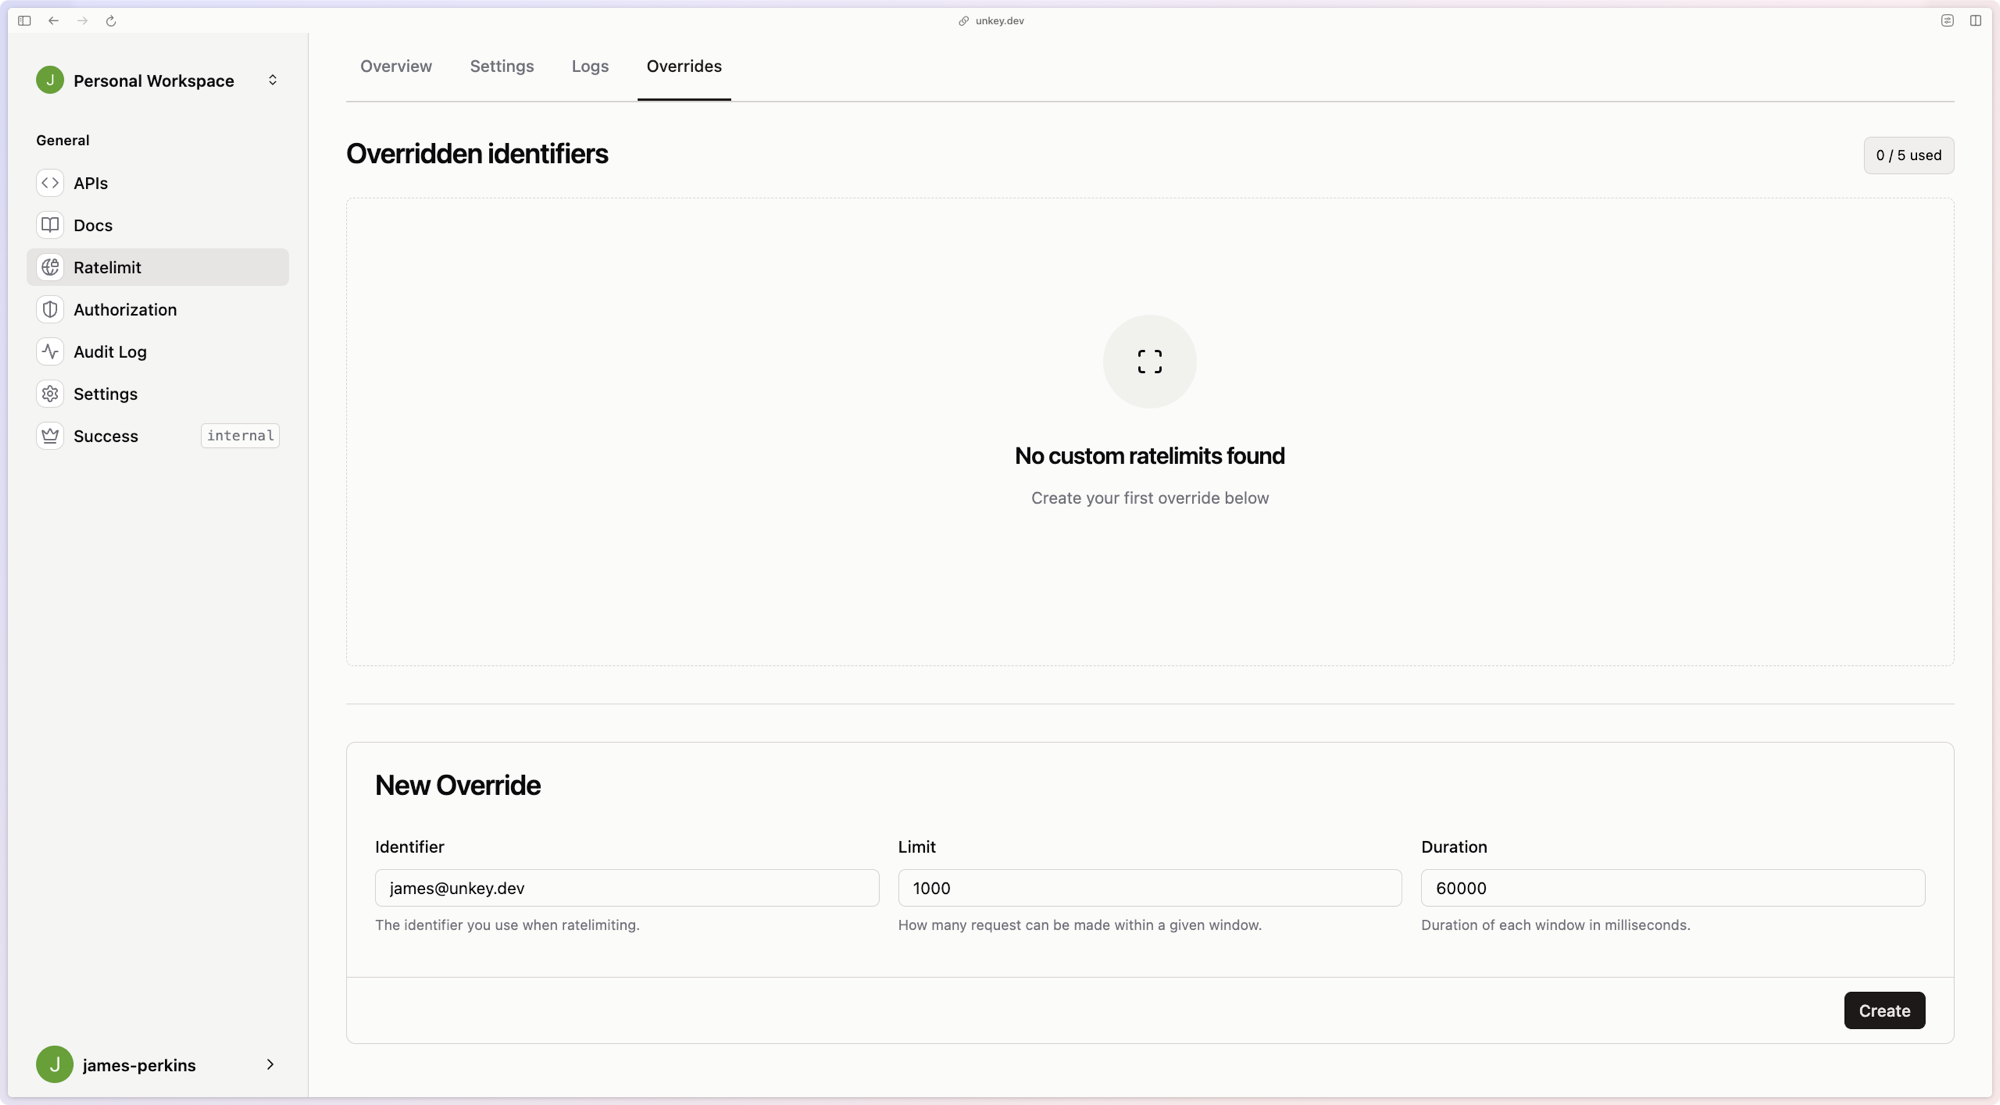
Overrides
Configurable overrides allow you to tell Unkey how to handle specific identifiers. For example, you may have a user or an IP that requires higher limits than your normal flows. Instead of having to write logic into your application, you can set the identifier in the dashboard, and we will handle it for you.
async requests
You can enable async requests, which will sacrifice minimal accuracy and improve the latency even further. Our accuracy when using async requests is around 97%, but we can reduce the latency over a synchronous request by 30ms. You can enable this in the configuration or for specific usage of the rate limiter.
Ratelimit configuriation
1const unkey = new Ratelimit({
2 // ...
3 async: true,
4});
Using the ratelimiter
1async function handler(request: NextApiRequest) {
2 const identifier = request.getUserId();
3
4 const ratelimit = await unkey.limit(identifier, {
5 async: true,
6 });
7 if (!ratelimit.success) {
8 return new Response("try again later", { status: 429 });
9 }
10 // handle the request here
11}
Cost configuration
Sometimes, you may have an expensive resource. We allow you to set a cost for the request, and we will deduct that cost from the current window and reject a request if it exceeds the allowed amount. For example:
1async function handler(request: NextApiRequest) {
2 const identifier = request.getUserId();
3
4 const ratelimit = await unkey.limit(identifier, {
5 cost: 4,
6 });
7 if (!ratelimit.success) {
8 return new Response("try again later", { status: 429 });
9 }
10 // handle the request here
11}
This request would now cost 4 tokens versus 1, allowing you to be flexible about handling the expensive resources in your application.
Resource Audit logging
Unkey provides audit logging out of the box at no additional cost to you. In cases where you want to create a paper trail, you can do by providing the ratelimit request with resource details, for example:
1async function handler(request: NextApiRequest) {
2 const identifier = request.getUserId();
3
4 const ratelimit = await unkey.limit(identifier, {
5 resources: [
6 {
7 id: "id_123",
8 name: "unkey",
9 type: "ai.generate",
10 },
11 ],
12 });
13 if (!ratelimit.success) {
14 return new Response("try again later", { status: 429 });
15 }
16 // handle the request here
17}
Sending a request with a resource will provide an audit log in our dashboard that you can use; below is how it looks:

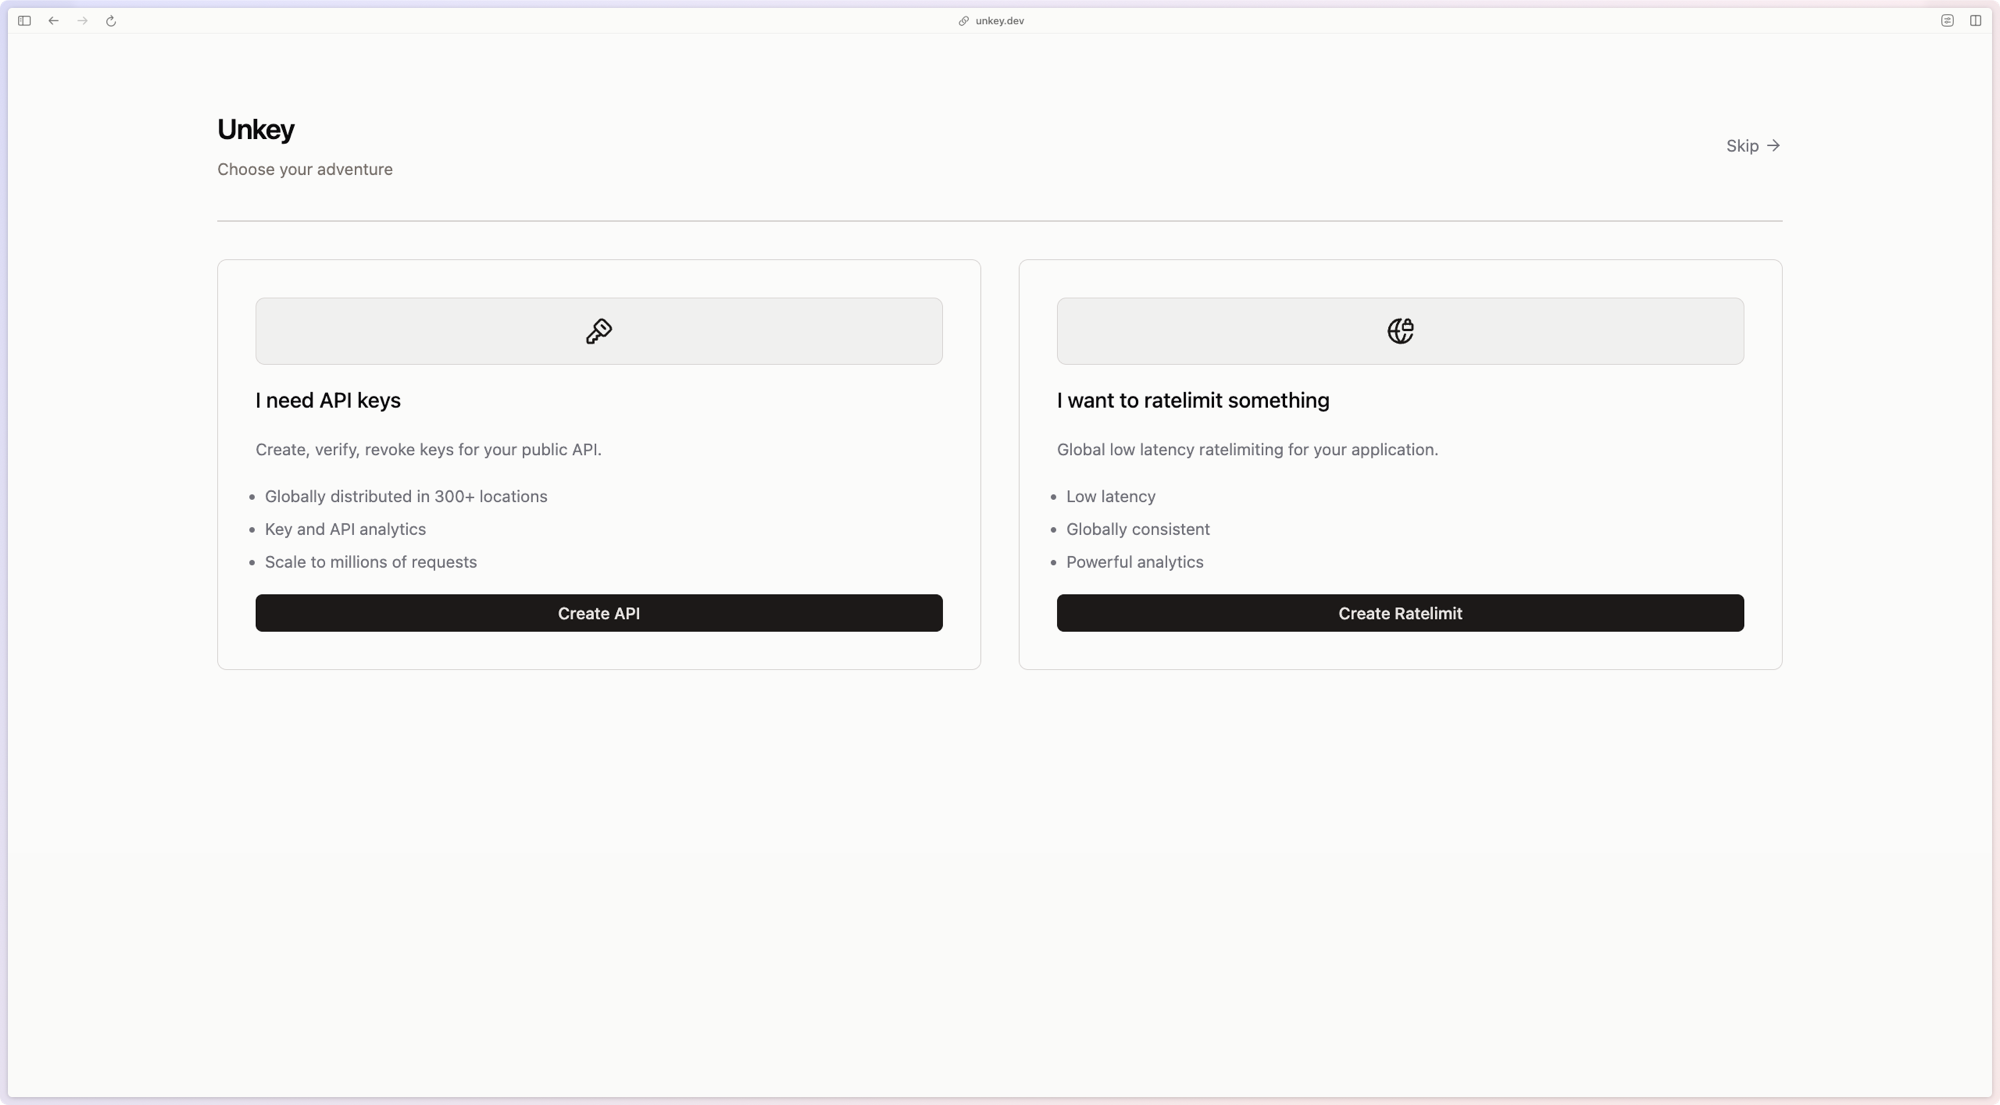
Onboarding flow
If you are new to Unkey, we have a new onboarding flow for ratelimiting that will get you up and running in seconds. After you create your workspace, you will be asked if you want to use API keys or ratelimiting.
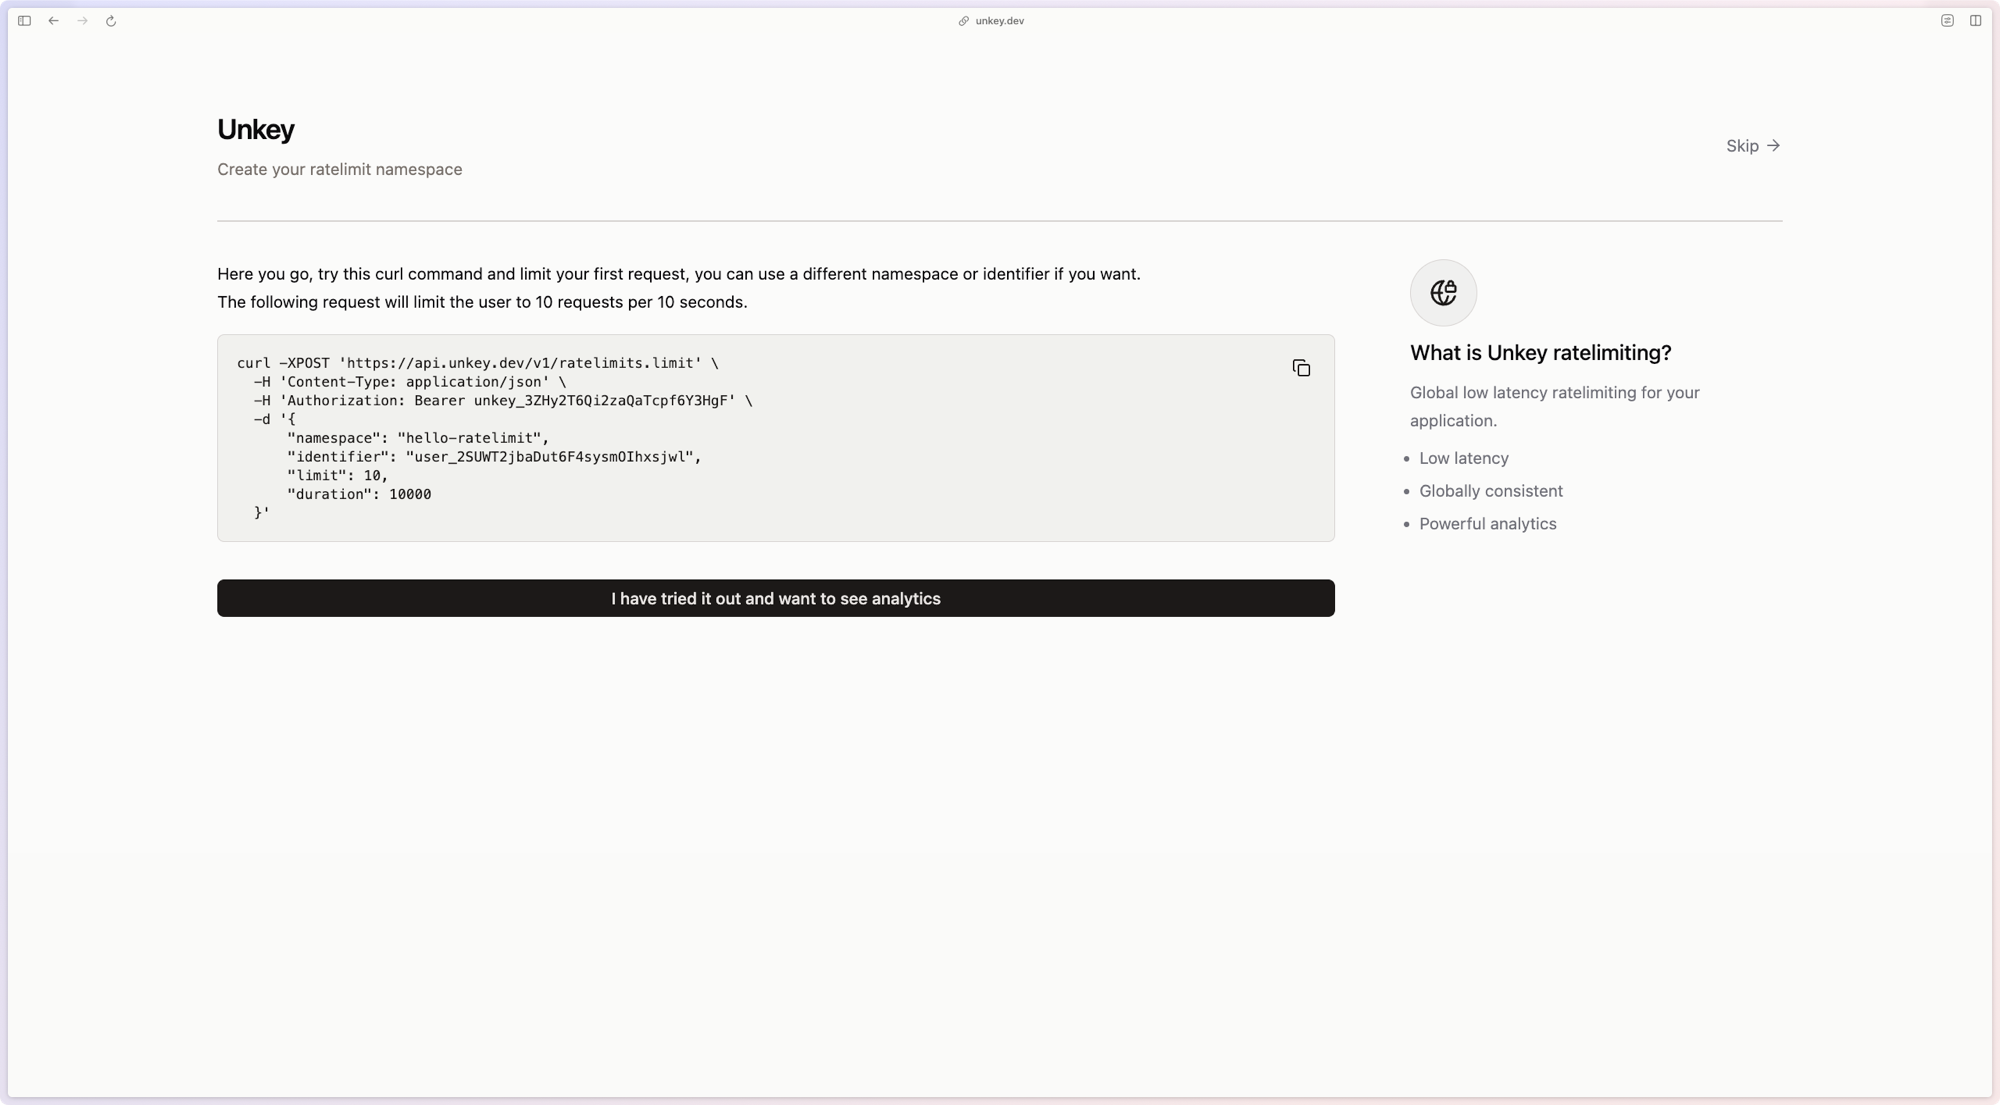
Once you select ratelimiting, we will give you a cURL command to test. This command will create your first namespace by requesting our ratelimit endpoint.
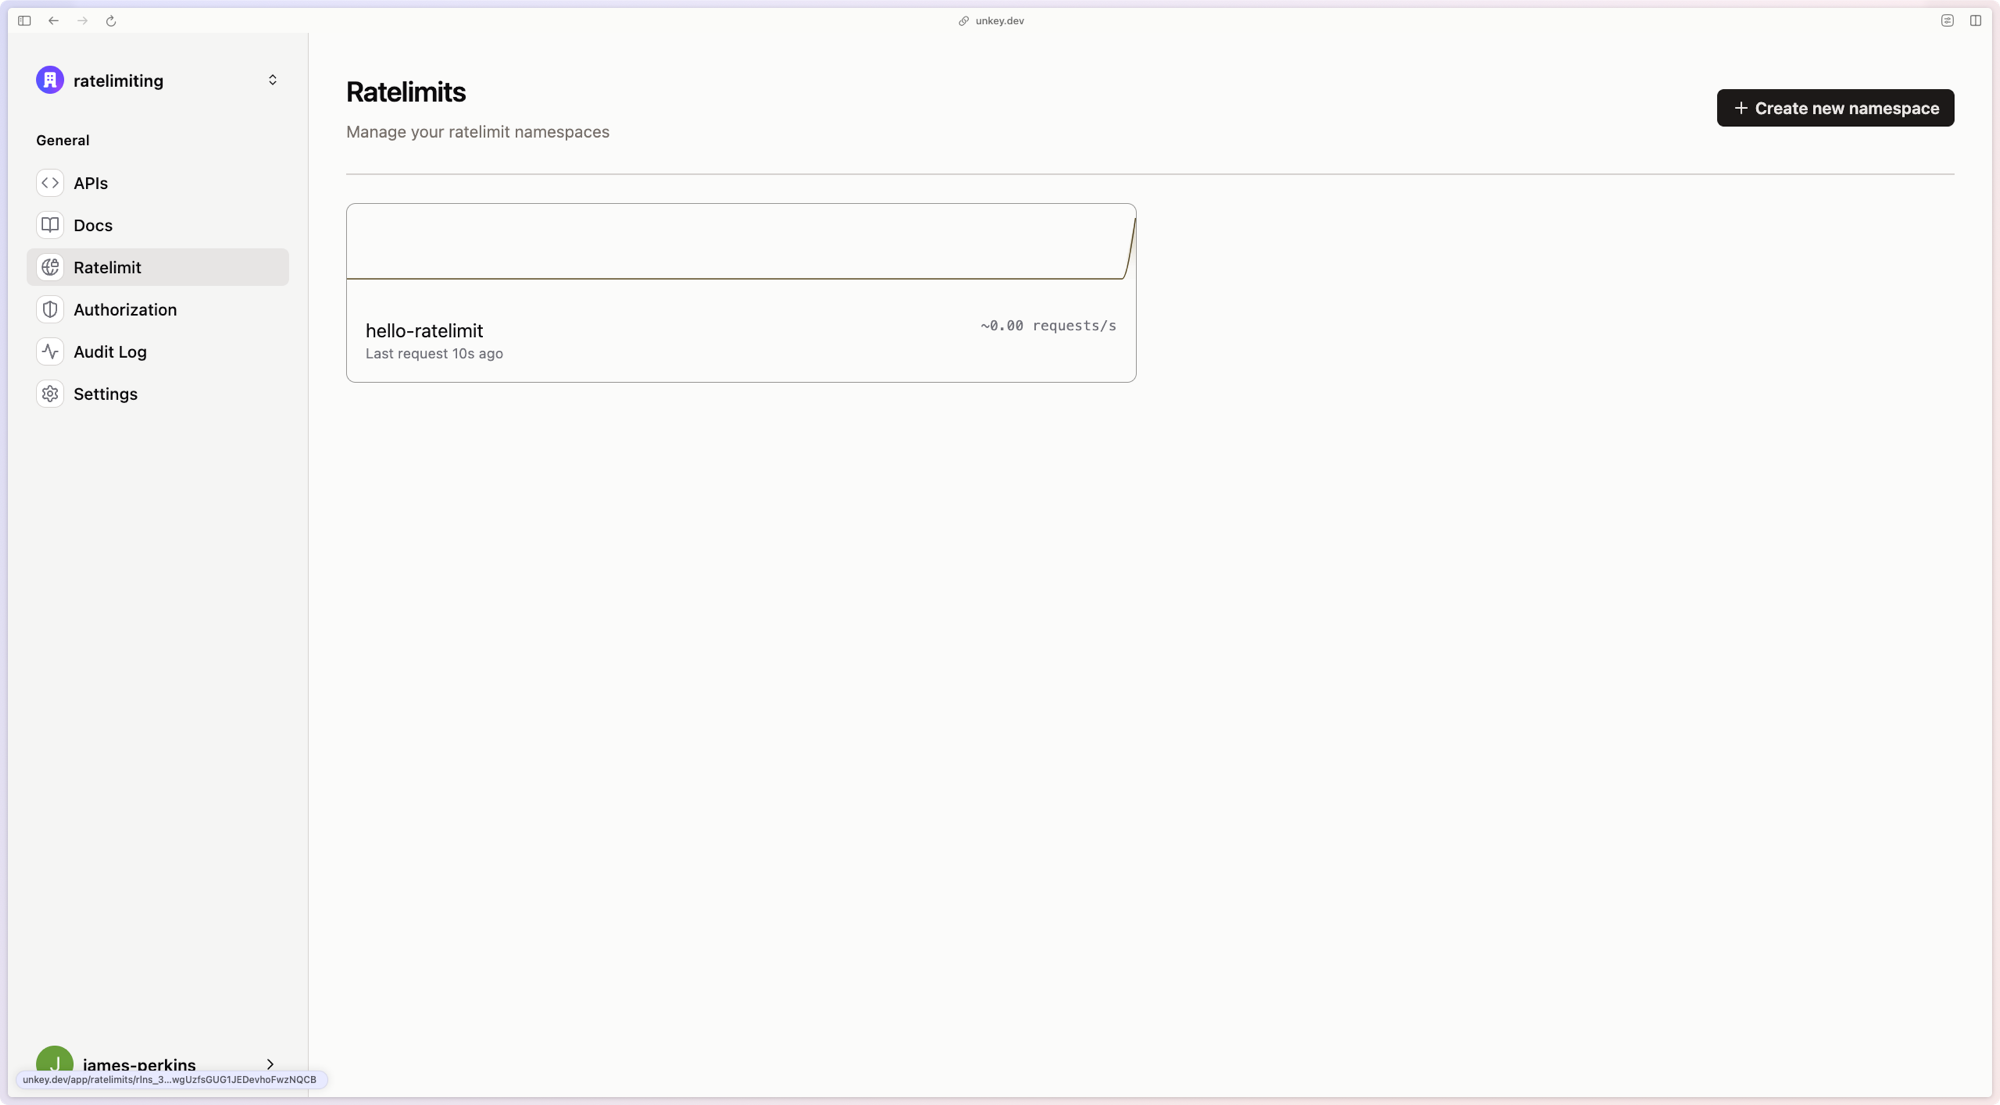
Now, you are ready to go and can start looking at our rich analytics or exploring the rest of Unkey.
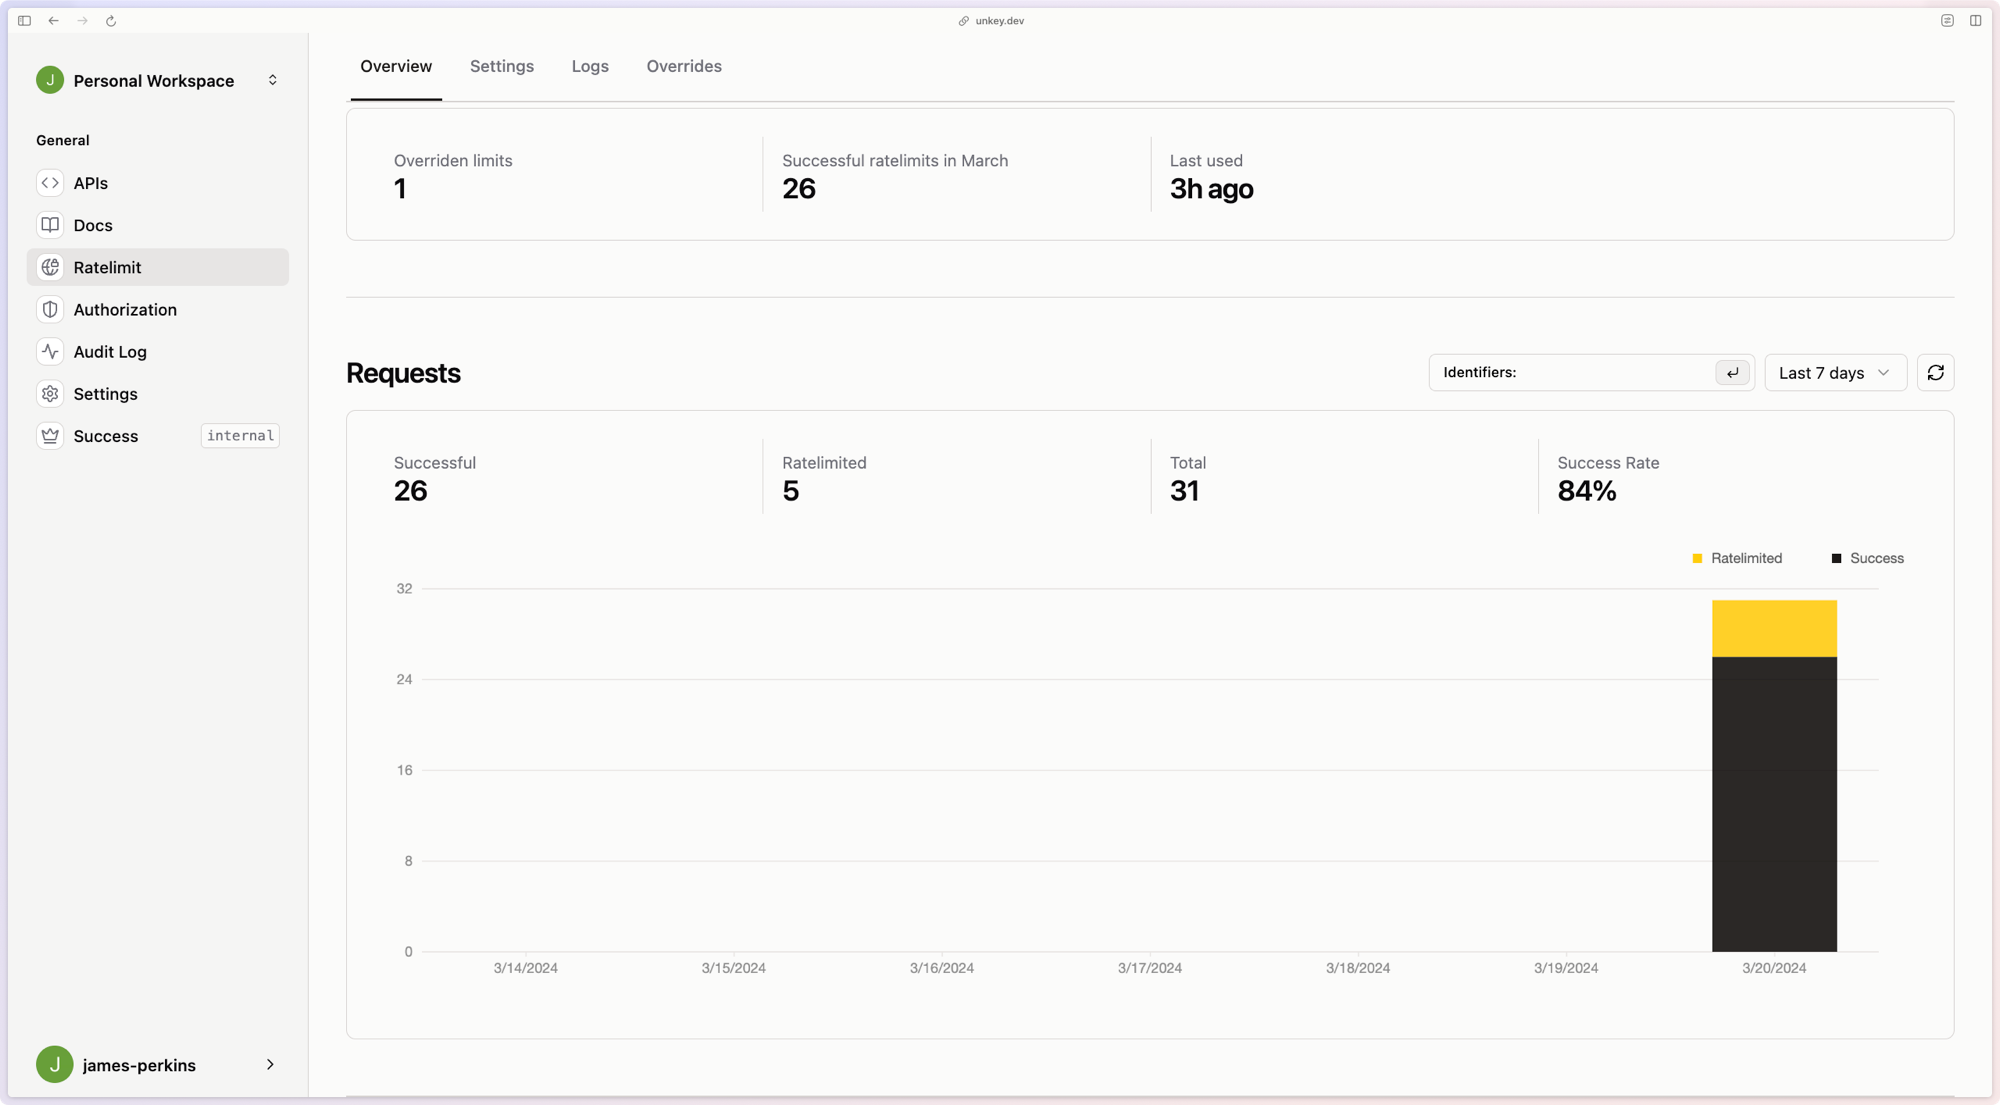
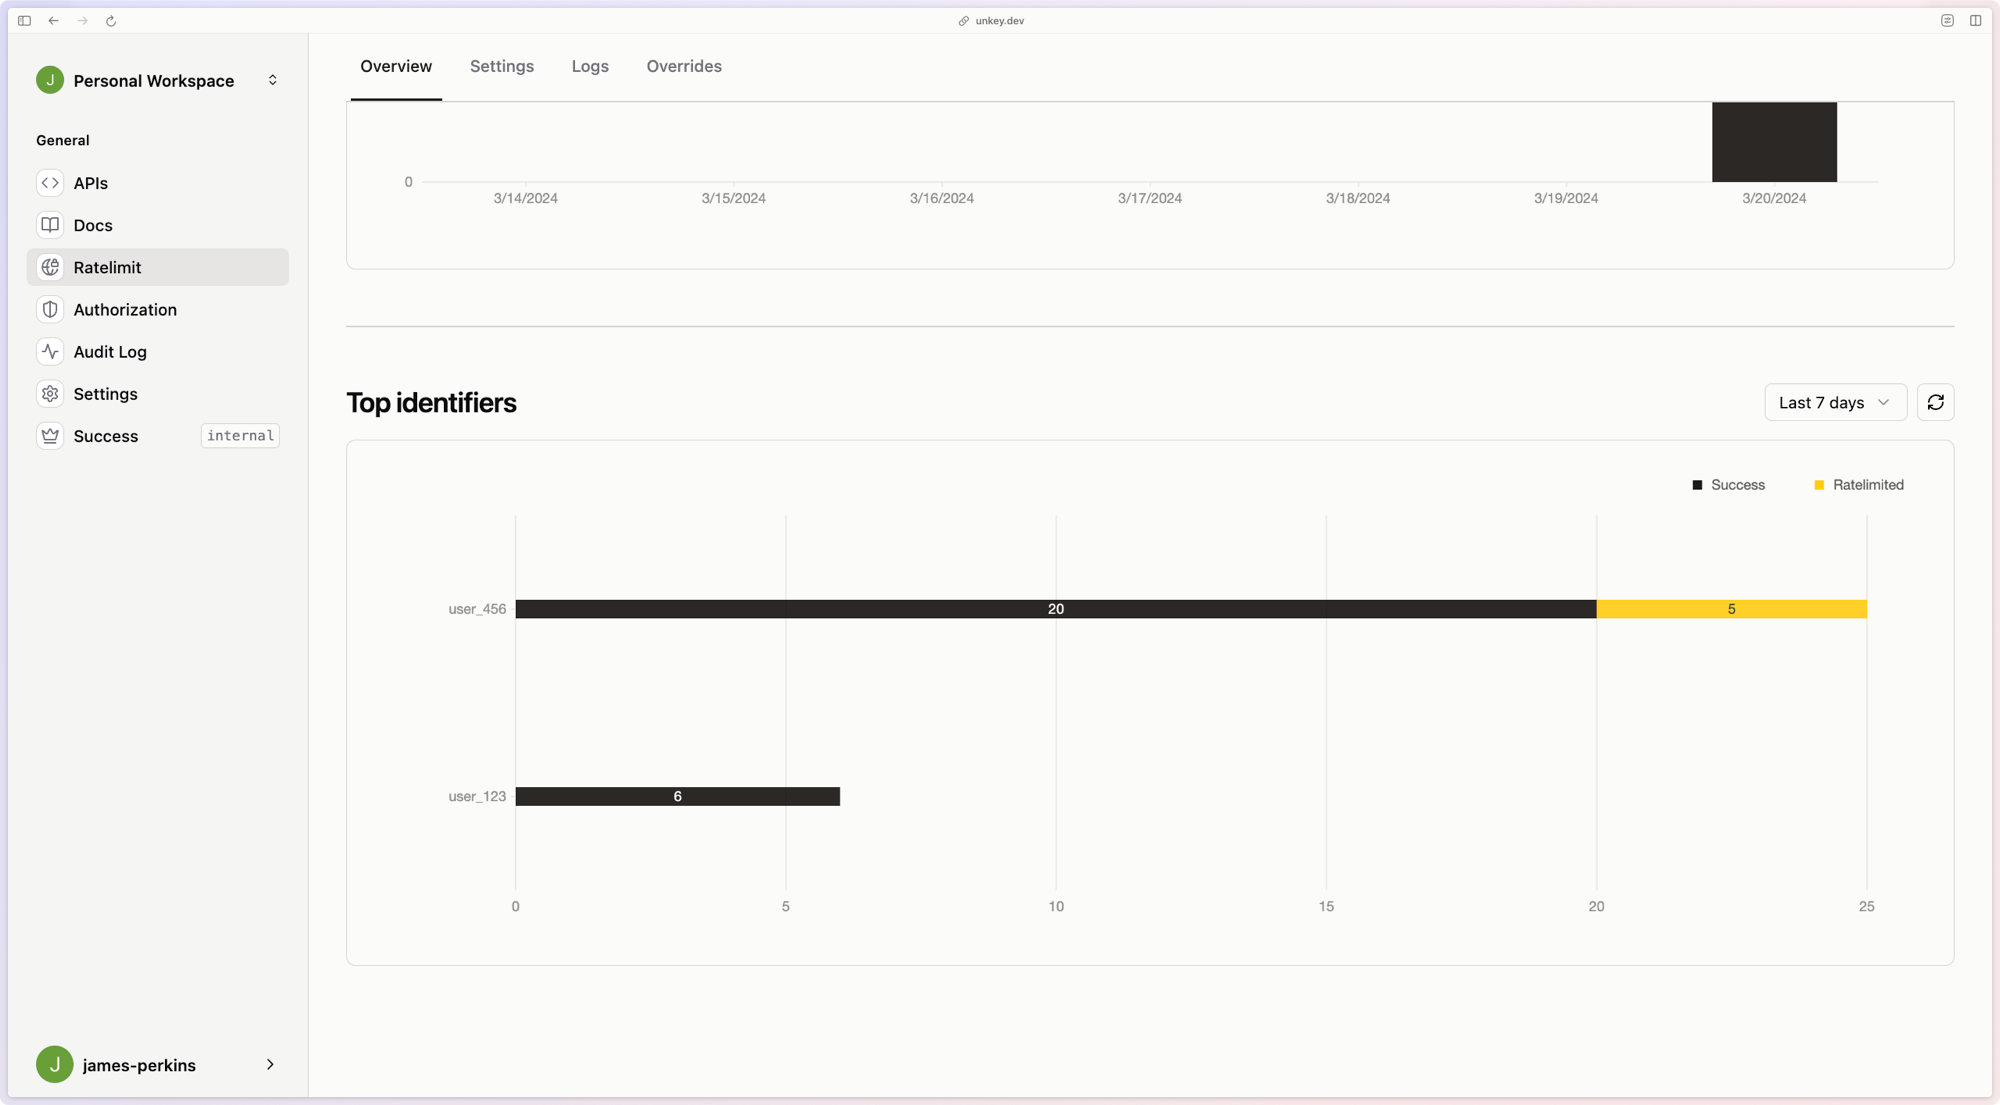
Analytics
Speaking of rich analytics, we provide rich analytical data that can filter around identifiers. These analytics can help you understand what parts of your application are used most and by whom.
If you are ready to start with our ratelimiter built for the modern web, check out our documentation or our new template to get you started. If you want to see how we implemented this, check out our GitHub repository.


Protect your API.
Start today.
2500 verifications and 100K successful rate‑limited requests per month. No CC required.